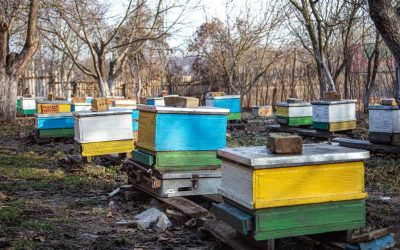
Beekeeping, or apiculture, is a fascinating endeavor that yields not just the sweet reward of honey but also crucial insights into the intricate workings of one of nature’s most complex societies. One of the critical activities involved in this practice is hive inspection, a systematic process that aids beekeepers in maintaining a healthy and productive bee colony.
This article is a comprehensive guide designed to educate new beekeepers about hive inspection – why it’s necessary, how often it should be performed, what to look for, and how to deal with common problems identified during an inspection. We’ll delve into hive anatomy basics, explore types of hive structures, discuss the preparations necessary before inspecting the hive, and share a few tips and tricks for an efficient hive inspection.
Why Hive Inspections are Important
As the world becomes more aware of the importance of bees to our ecosystem, there is an increasing sense of urgency in bee hive inspection. With the recent decline in bee populations, beekeepers must know what to look for during hive inspections to ensure the health and productivity of their colonies.
Just like regular check-ups with a doctor are essential for our health, regular hive inspections are crucial for the well-being of our bee colonies. During these inspections, you check for signs of diseases or pests, space availability for the queen to lay eggs, adequate food supply, and overall hive health. By identifying potential problems early, you can take proactive measures to prevent them from escalating, thereby ensuring the survival and productivity of your colony.
Essential Equipment for Hive Inspection
Safety and efficiency are paramount when inspecting your hive. Here is the essential equipment you’ll need:
-
- Bee Suit: A full bee suit, including a veil, provides protection against stings.
- Gloves: Specialized beekeeping gloves protect your hands without reducing dexterity.
- Bee Smoker: Smoke calms bees, making them less likely to sting during the inspection.
- Hive Tool: A hive tool is used to pry apart frames that are stuck together with propolis, the bee’s “glue.”
Safety Precautions
Safety should be your top priority during a hive inspection. Always wear your bee suit and gloves to protect against stings. Use the smoker wisely; a few puffs at the hive entrance and beneath the top cover is usually sufficient. Handle the bees and frames gently to prevent harm.
Preparing for Hive Inspection
Prior to inspecting the hive, ensure that you are well-prepared to minimize disturbances to the bees. Wear a bee suit, complete with gloves and a veil to protect yourself from stings. Use a smoker to calm the bees during your inspection; a few puffs at the hive entrance should suffice. Always inspect during warm, dry, and calm days, as bees are less likely to be defensive then. Mid-morning to early afternoon is ideal, as many worker bees will be out foraging, reducing the hive’s population and making inspection easier.
Hive Inspection
Inspection frequency can vary based on your region, time of year, and the health of the hive. However, a good rule of thumb for new beekeepers is to inspect every 7-10 days during the active season, allowing you to track the hive’s progress and catch any problems early.
The primary reasons for hive inspections are to monitor the health of the queen, check for pests or diseases, and assess the overall health and productivity of the colony. Here’s what to look for:
Queen Health
The queen is the heart of the colony. Look for signs of her presence, such as newly laid eggs or young larvae. If you don’t see her, don’t panic; she can be elusive. Signs of her productivity are sufficient.
Brood Pattern
A healthy brood pattern is compact, with few empty cells, indicating a productive queen. A spotty or irregular brood pattern may signal problems, such as disease or an underperforming queen.
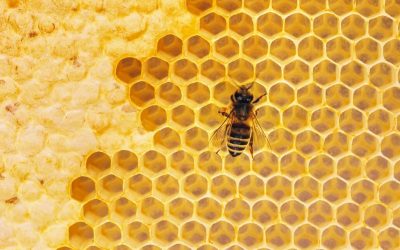
Honey and Pollen Stores
Adequate stores of honey and pollen are essential for the survival of the hive, especially over winter. Honey is stored in the upper parts of the comb and should be capped, while pollen, the protein source for bees, is usually stored in cells around the brood chamber.
Signs of Disease or Pests
Look for signs of mites, beetles, or wax moths. Also, check for signs of disease like foulbrood, indicated by a foul smell, or chalkbrood, signified by a mottled brood pattern.
The Hive Inspection Process
A thorough hive inspection involves several steps:
-
- Smoke the Hive: Start by lightly smoking the hive entrance and beneath the top cover to calm the bees.
- Remove the Cover: Next, slowly and carefully remove the outer and inner covers to avoid crushing any bees.
- Inspect the Top Frames: Using your hive tool, gently lift a frame from the top box. Hold it up to the sunlight to get a good look at both sides. You’re looking for evidence of healthy brood, honey, and pollen.
- Look for the Queen: The queen bee is typically larger than the other bees. However, spotting her isn’t always easy. If you can’t find her, look for eggs; their presence indicates a healthy, laying queen.
- Check the Bottom Frames: Repeat the inspection process with the bottom frames.
- Look for Signs of Pests and Diseases: Be vigilant for symptoms of disease, such as black, moldy brood (a sign of Foulbrood) or deformed wings (indicative of Varroa mites).
- Close the Hive: Once you’ve completed the inspection, carefully replace the frames in the same order you found them. Then, slowly replace the inner and outer covers.
Understanding the Inspection Results
Understanding your inspection findings is critical for managing hive health:
Healthy Brood Pattern
Healthy brood should cover most of the frame in a compact pattern. They will be pearly white and lie beneath a light tan to dark brown wax cap.
Pollen and Honey
Bees store pollen and honey in the cells surrounding the brood. A diverse supply indicates a healthy colony.
Signs of Disease or Pests
Pay close attention to any signs of pests or disease. If you spot anything unusual, research what it might be and take action quickly.
Identifying Common Problems During Inspection
During your inspection, you may encounter common beekeeping problems like:

Swarming
Swarming is a natural phenomenon wherein a large group of bees, including the queen, leaves the hive to establish a new one. Signs of imminent swarming include overcrowded conditions and the presence of queen cells.

Queenlessness
A hive without a queen will not survive long. Signs of a queenless hive include a lack of eggs or young larvae and aggressive or listless behavior. If you can’t find the queen or signs of her (like eggs), your hive may be queenless. You might need to introduce a new queen.
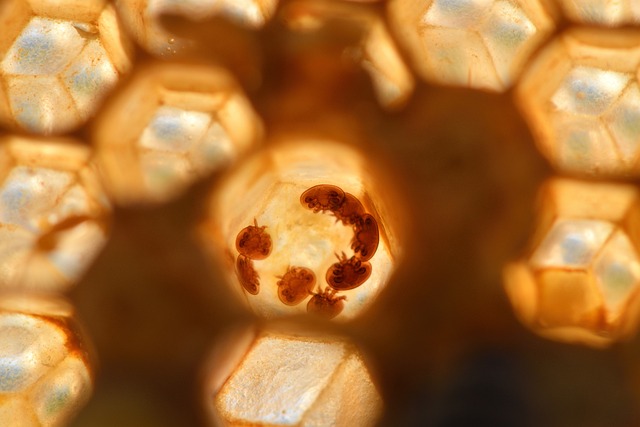
Varroa Mites
If you notice bees with deformed wings, your hive may have Varroa mites. These parasites are a major threat to bees. Treatments are available to help control this pest.
If you spot these problems, don’t panic. With time and experience, you’ll learn how to handle them effectively.

Diseases
If you see black, moldy brood, your hive could be infected with Foulbrood, a serious bacterial disease. Depending on severity, you may need to destroy the hive to prevent spreading the disease.
Hive Inspection Tips and Tricks
Finally, here are a few tips to make your hive inspections more efficient:
-
- Be Gentle: Rough handling can stress your bees and make them more defensive. Be slow and gentle in your movements.
- Take Notes: Keep a record of each inspection. Note down the hive’s condition, behavior, honey production, and any other observations. This can be a valuable reference for future inspections.
- Use a Hive Tool: A hive tool is an indispensable piece of equipment for separating hive bodies and frames, which can become sticky with propolis.
Regular Maintenance and Follow-Up Inspections
Routine hive inspections are the cornerstone of successful beekeeping. Depending on your region and the time of year, you should perform inspections every 7 to 10 days during the active season. Less frequent inspections may be required during colder months. Understanding seasonal changes and adapting your inspection routine accordingly is key to maintaining a thriving colony.
Conclusion
Regular hive inspections are a crucial part of beekeeping, giving you insights into the health and productivity of your colony. They allow you to identify and resolve potential issues before they become major problems. Remember, each inspection provides a learning opportunity. With practice, you will become more proficient and confident, leading to a more productive and healthier hive. Happy beekeeping!